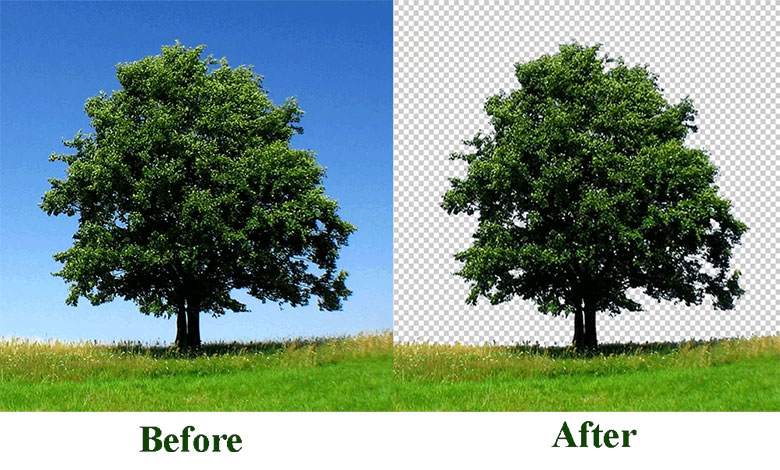
Images play a crucial role in our modern lives, permeating various aspects of personal and commercial use. Whether it’s for e-commerce, graphic design, or personal projects, having high-quality photos is essential. One effective technique to create visually appealing images is background removal. By eliminating the background, you can achieve clean and sharp photographs that truly stand out. While Photoshop is a powerful tool that can assist you in this process, it may initially pose a challenge for beginners who lack familiarity with its tools and techniques.
In this post, we will guide you through the process of removing backgrounds from photographs in Photoshop, offering useful tips and methods to facilitate a smoother experience. It’s important to note that background removal requires some level of proficiency in Photoshop, but with practice and guidance, you can master this skill.
Table of Contents
Why is Background Removal Important?
Background removal is crucial for enhancing the visual appeal of images, particularly in commercial contexts. It allows the subject to stand out, creating a professional look and attracting potential customers. Moreover, it enables the use of transparent images in graphic design and creative projects, offering flexibility and versatility. By mastering background removal, individuals save time and money by eliminating the need for professional assistance. Overall, it is an essential technique for creating visually captivating images and unleashing creative potential.
Tools and Techniques for Background Removal in Photoshop
When it comes to removing the background from an image in Photoshop, there are several tools and techniques you can use. These methods require a basic understanding of Photoshop’s features. Let’s explore some commonly used tools and techniques for background removal:
One tool you can utilize is the Magic Wand tool. This selection tool allows you to choose an area based on its color. It can be handy for selecting and deleting the background. However, keep in mind that the Magic Wand tool may not be suitable for complex images or ones with similar colors in the subject and background.
The Lasso tool is another option at your disposal. It enables you to draw around the subject to make a selection. This tool is useful for objects with irregular shapes, although it can be time-consuming and may not work well for intricate details.
If precision is your priority, the Pen tool is your best bet. This vector-based tool lets you create precise paths around the object. You can use the Pen tool to select the subject and create a path around it. While it may require more time and effort, the Pen tool yields highly accurate results.
An alternative technique involves using Layer Masks. Layer Masks provide a non-destructive way to hide parts of an image. You can remove the background by painting on the mask with black to hide the background and white to reveal the subject. This approach is flexible and allows for adjustments and refinements later on.
Remember, mastering these tools and techniques will require practice and experimentation. By familiarizing yourself with these methods, you’ll gain the skills necessary to effectively remove backgrounds from images in Photoshop.
Step-by-Step Guide to Removing Backgrounds in Photoshop
Let’s go through the step-by-step process of removing the background from an image in Photoshop. Follow these instructions to achieve a clean and professional result:
Step 1: Open your image in Photoshop by going to File > Open and selecting the image file from your computer.
Step 2: Duplicate the background layer to create a working copy. Right-click on the Background layer in the Layers panel and choose Duplicate Layer.
Step 3: Use one of the selection tools mentioned earlier, such as the Magic Wand tool or the Pen tool, to carefully select the subject of the image. Ensure that you have a precise selection around the subject by refining it as needed.
Step 4: Invert the selection to choose the background instead. Go to Select > Inverse to switch the selection from the subject to the background.
Step 5: Press the Delete key on your keyboard to remove the selected background. If any parts of the subject are unintentionally deleted, use the Brush tool with white color to restore those areas.
Step 6: To enhance the overall appearance and achieve a natural look, refine the edges of the subject. Go to Select > Refine Edge to access the Refine Edge dialog box. Use the available tools to adjust the edges, making them appear smooth and seamless. Once you’re satisfied, click OK.
Step 7: Save your edited image. Choose File > Save As and select the PNG format to retain the transparent background. Give your file a name and save it to your desired location on your computer.
By following these steps, you’ll be able to remove the background from your image effectively and create a professional-looking result. Remember to practice and experiment with different tools and techniques to improve your skills in background removal.
Common Mistakes to Avoid in Background Removal
When removing the background from an image, it’s important to be aware of common mistakes that can hinder the process and affect the final result. Here are some mistakes to avoid:
- Overusing the eraser tool: Relying too heavily on the eraser tool can lead to errors and uneven edges. Instead, utilize selection tools and layer masks for more precise editing.
- Rushing the process: Background removal requires patience and attention to detail. Rushing through it can result in mistakes and a subpar outcome. Take your time and ensure accuracy.
- Forgetting to refine the edges: Refining the edges of the subject is crucial for achieving a natural and professional appearance. Use tools like the Refine Edge or Select and Mask to fine-tune the edges and make them seamless.
- Saving and exporting images with transparent backgrounds: To preserve the transparency of the background, save your image as a PNG file. Ensure the transparency option is checked when saving.
If you don’t have access to Photoshop or prefer alternative methods, there are online background removal tools available such as Remove.bg and Clipping Magic. Additionally, GIMP, a free and open-source image editing software, offers background removal capabilities.
In conclusion, removing the background from an image in Photoshop requires care, attention, and the right tools. By avoiding common mistakes, taking your time, and refining the edges, you can achieve professional-looking results. Remember, practice and experimentation will help you improve your background removal skills over time.